If your washing machine won’t drain, first stop the cycle, switch the washer off, and check the selected program, load balance, and visible drain hose. Then run the manufacturer’s Drain/Spin cycle. Clean a user-accessible pump filter only if your model’s manual specifically explains how. Do not remove panels, reach into wiring, or force a locked door.
Standing water does not always mean the drain pump has failed. A paused cycle, unbalanced load, kinked hose, excessive detergent, blocked household drain, or clogged user-serviceable filter can produce the same symptom. Work through the checks below in order, stopping if you see a leak, smell burning, hear grinding, or cannot safely reach a component.
Before you start: prevent spills and electrical risk
- Turn the washer off. Unplug it before touching the hose or filter area.
- If the last cycle used hot water or steam, wait for the water to cool.
- Keep children and pets away, and place towels plus a shallow tray nearby.
- Never open a locked door with water visible above the bottom of the glass.
- Do not tilt the appliance, remove its cabinet, bypass a lock, or touch internal wiring.
Model designs differ. Find the model number and open the exact use-and-care manual before cleaning a filter or moving a hose. Brand-specific measurements should come from that manual, not from a generic number online.
1. Confirm the cycle has actually finished
Look for Pause, Rinse Hold, No Spin, Suds, or a time-delay indicator. Delicate and hand-wash programs may use a slower spin, leaving clothes wetter than expected. Cancel the paused option if necessary, close the door or lid fully, and select Drain/Spin or the equivalent program listed in your manual.
Verify: listen for the drain pump and watch the water level for two minutes. If the level begins falling, let the program finish. If the controls are blank, confirm the wall outlet works with a safe, low-power device rather than opening the washer.
2. Redistribute an unbalanced or oversized load
A heavy blanket, bath mat, or tightly packed load can prevent a washer from reaching the spin stage. Switch off the machine and wait for the door or lid to unlock normally. Remove some items, spread the remainder evenly, and try Drain/Spin again.
Verify: the drum should accelerate without repeated banging or stopping. Stop immediately if the washer moves across the floor or makes harsh mechanical noises.
3. Check for too many suds
Using non-HE detergent in a high-efficiency washer, or simply using too much detergent, can create excessive foam and delay draining. Do not add more detergent or a household chemical. Follow the model manual’s suds-reduction or rinse instructions, then run the recommended rinse or drain cycle.
Verify: after the extra rinse, foam should reduce and water should leave normally. Persistent suds may require another water-only rinse according to the manual.
4. Inspect the visible drain hose
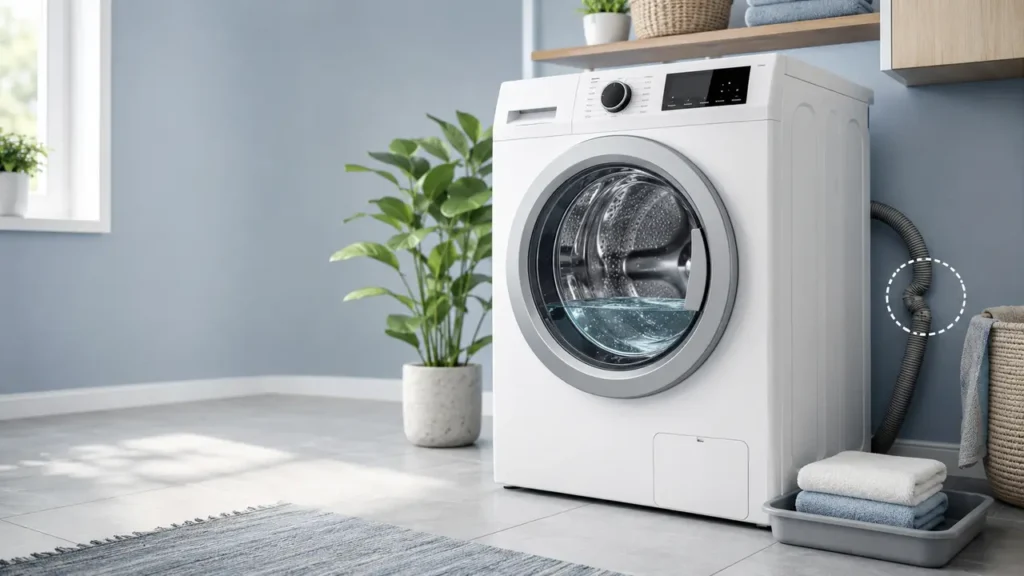
Unplug the washer and look at the hose from the rear of the cabinet to the standpipe, laundry tub, or drain connection. Straighten any gentle kink and make sure the washer is not crushing the hose against the wall. Check that the hose is secured and has not slipped too far into the drain.
Do not disconnect a hose full of hot water unless your manufacturer’s instructions tell you how to contain the water. Do not tape the hose into an airtight seal. Whirlpool’s troubleshooting guidance identifies kinks, clogs, and improper hose placement as common causes of drainage trouble.
Verify: reconnect power and run Drain/Spin while watching only from a dry area. The hose should remain secure, and the household drain should accept water without backing up.
5. Check the household drain for backup
If water rises in the standpipe, laundry sink, or nearby floor drain while the washer pumps, the problem may be in the home’s plumbing rather than the washer. Stop the cycle before it overflows. Avoid chemical drain cleaners because they can remain in the line and expose anyone who later disconnects the hose.
Verify: the drain should carry away water without rising around the hose. Call a qualified plumber if the standpipe or sink backs up.
6. Make sure the washer is level
An unlevel machine can contribute to imbalance and interrupted draining. With the washer off, press gently on opposite top corners. It should not rock. Use a bubble level if available, and follow the installation manual for foot adjustment. Do not put improvised blocks under the feet.
Verify: run a small rinse-and-spin load. The washer should remain stable without repeated balance corrections.
7. Clean only a user-accessible pump filter
Some front-load washers have a pump filter behind a small service flap; many top-load models do not provide a user-cleanable filter. Check the exact manual first. If cleaning is supported, unplug the washer, allow hot water to cool, place a shallow tray and towels below the flap, and use the model-specific emergency drain hose if provided. Open the filter slowly because water may escape.
Remove lint or small objects that are loose and visible, then reinstall the filter exactly as the manual directs. Never reach deeper into the pump, use tools on the impeller, or remove the washer’s main panel. Samsung’s current guidance limits filter cleaning to front-load models with a removable pump filter.
Verify: run the manufacturer’s short test or Drain/Spin program and check the filter area for leaks. Switch off and unplug the washer immediately if water appears around the cap.
8. Read the error code in the model manual
Photograph the code before switching the washer off. Drain-related codes vary by brand and model, so use the official support page or manual for your exact machine. Follow only the owner-level steps listed there. A code that returns after the hose, load, and filter checks is useful information for a technician.
Verify: the code should clear only after a completed test cycle. Do not repeatedly reset the machine to hide a returning fault.
9. Perform one controlled power reset
If the manual permits a reset, turn the washer off, unplug it for the stated time, reconnect it directly to a grounded wall outlet, and run Drain/Spin. Do not use an extension cord, power strip, or adapter. A reset may recover a stalled control, but it cannot repair a blocked pump or damaged part.
Verify: the cycle should start, pump water out, and finish without the code returning. If it fails again, stop testing.
When to call a qualified appliance technician
Arrange service if the washer still holds water after these checks, the pump only hums, the door remains locked after water has cooled, or the filter is not user-accessible. Stop immediately for a burning smell, smoke, sparking, repeated breaker trips, a damaged cord, a major leak, grinding, or water near an outlet. These conditions require trained diagnosis rather than further DIY work.
Quick verification checklist
- Drain/Spin completes and the drum is empty.
- No error code returns.
- The hose is unkinked, secured, and not leaking.
- The standpipe or sink does not back up.
- The washer stays level and stable.
- The filter cap area remains dry after a test cycle.
If all six checks pass, run a small normal load before returning to full loads. For more safe, symptom-first guides, browse Home Appliance Troubleshooting. Solve Fast also covers connected-device problems such as a missing Wi-Fi option in Windows 11 and Android phones not receiving text messages.
For another common appliance problem, follow our refrigerator not cooling safety checklist.
Official sources