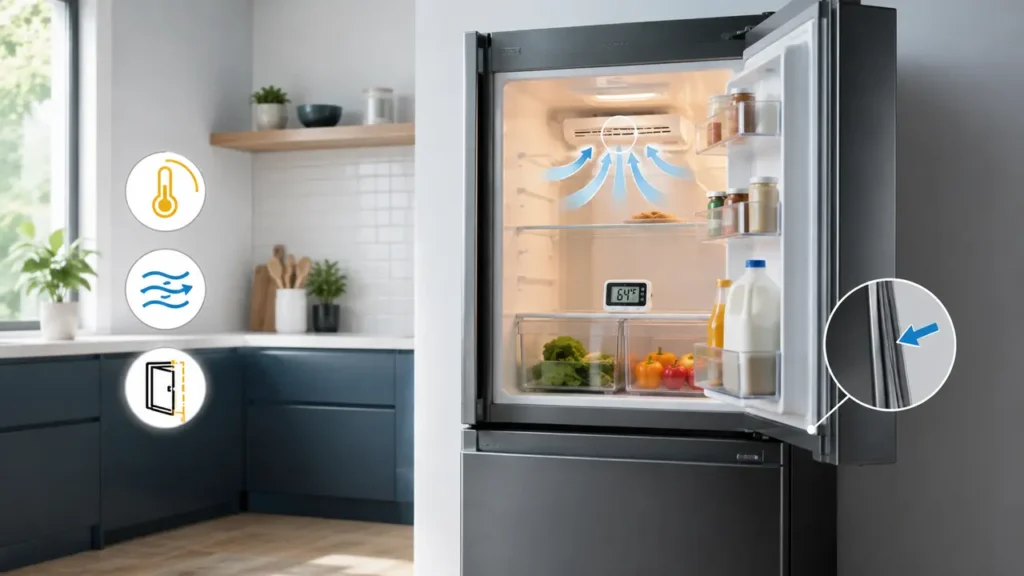
Quick answer: If your refrigerator is not cooling, first confirm the temperature with an appliance thermometer, check that cooling is switched on, clear food away from the internal vents, and make sure the doors seal completely. Allow up to 24 hours after a new installation, major food load, or temperature adjustment. If the fridge remains above 40°F (4°C), protect the food and arrange qualified service instead of opening electrical panels or the sealed cooling system.
This safety-first checklist covers checks you can perform without disassembling the refrigerator. For more practical appliance guidance, browse our Home Appliance Troubleshooting guides.
Protect the food before troubleshooting
A cooling problem can become a food-safety problem before it becomes an appliance-repair problem. Put an appliance thermometer near the center of the refrigerator compartment and keep the door closed while it stabilizes. The refrigerator should stay at 40°F (4°C) or below; a freezer should normally be around 0°F (-18°C).
According to the USDA refrigeration guidance, perishable food held above 40°F for more than two hours may be unsafe. Move vulnerable food to another working refrigerator or an ice-filled cooler while you diagnose the appliance. Never taste food to decide whether it is safe.
Identify the cooling pattern first
The pattern helps you choose useful checks and avoid unnecessary resets:
- Both compartments are warm: check power, cooling settings, Demo mode, installation conditions, doors and condenser airflow.
- The freezer is cold but the refrigerator is warm: blocked internal vents, overpacked shelves or a failed airflow component may be involved.
- Lights are on but there is no cooling: confirm the controls are not off and remember that fans and the compressor can pause during a normal defrost cycle.
- No lights or display: check the plug and household breaker only from safe, accessible positions. Stop if the plug, cord or outlet is damaged or unusually hot.
1. Measure the actual temperature
Do not rely only on how a bottle or shelf feels. Place a refrigerator thermometer in a glass of water on a middle shelf, close the door, and check it after several hours. Put a second thermometer between frozen packages if you need to evaluate the freezer.
Write down the temperature and time. This baseline lets you see whether later changes improve cooling. A control-panel number may show the selected setting rather than the actual air or food temperature.
2. Confirm the controls and cooling mode
Check that the refrigerator and freezer controls are at the manufacturer’s recommended settings. Avoid jumping directly to the coldest setting; change one step at a time and wait before judging the result. Look for “Cooling Off,” “Demo,” “Showroom,” “OF OF” or a similar message. Demo mode keeps the lights and display active while disabling cooling.
The exact method for leaving Demo mode varies by model, so use the model’s owner manual rather than trying random button combinations. Samsung’s current refrigerator cooling checklist recommends checking settings, use conditions and door seals before service.
3. Allow enough recovery time
A newly installed refrigerator may need up to 24 hours to reach its normal temperature. Cooling can also take several hours after a power interruption, a long door opening, a large grocery load or a temperature adjustment. Keep the doors closed as much as possible during recovery.
If the temperature is moving steadily downward, continue monitoring. If it is rising, already unsafe for food, or unchanged after the manufacturer’s recovery period, move the food and continue with the checks below.
4. Clear the internal air vents
Cold air must circulate between compartments. Find the visible supply and return vents shown in the owner manual, then move packages several inches away from them. Do not push containers against the rear wall or stack food tightly to the ceiling.
Whirlpool’s refrigerator troubleshooting guidance specifically recommends checking for blocked vents. Do not remove a vent cover or fan housing; a persistent airflow problem behind a cover needs a technician.
5. Check that every door closes and seals
Inspect shelves, drawers, food packages and door bins for anything preventing a complete close. Wipe crumbs and sticky residue from the gasket with a soft cloth, warm water and mild dish soap, then dry it. Look for loose, split, hardened or visibly deformed sections.
Use the paper test at several points: close the door on a strip of paper and pull gently. Some resistance is normal. If the paper slides out freely in one area after the gasket and cabinet edge are clean, the gasket or door alignment may need professional correction. Do not heat, cut or stretch the seal.
6. Improve loading and everyday airflow
A completely empty compartment can fluctuate, but an overfilled one blocks circulation. Space items so air can move around them. Keep containers away from vents, avoid storing hot pots before they have cooled safely, and reduce unnecessary door openings.
Check that the refrigerator is level enough for the doors to close as described in its installation instructions. Do not improvise supports or tilt the appliance while it is loaded.
7. Check the room and installation conditions
Refrigerators need ventilation around the cabinet and can struggle next to an oven, radiator, direct afternoon sun or in a room outside the model’s approved temperature range. Check the owner manual for required side, top and rear clearances.
Do not pull a heavy refrigerator forward alone. If access is unsafe, the floor is uneven, or the water line and power cord could be strained, stop and get help. Whirlpool notes that many household models are intended for room temperatures between about 55°F and 110°F (13°C to 43°C), but your manual is the authority for your model.
8. Clean only safely accessible condenser areas
Dust and pet hair can reduce heat removal on models with accessible condenser areas. First read the owner manual. If it directs routine cleaning, switch the refrigerator off and unplug it with dry hands, then vacuum only the grille and areas the manual identifies as user-accessible. Reinstall any user-removable grille exactly as instructed before reconnecting power.
Do not remove a rear service panel, reach near a fan, bend tubing, use compressed air inside the cabinet, or work around exposed electrical connections. Some modern refrigerators have condensers that do not require routine owner cleaning.
9. Use one controlled reset only when the manual allows it
If the controls appear frozen after a power interruption, the manufacturer may recommend disconnecting power briefly. Save the current settings, move vulnerable food if necessary, switch the appliance off, unplug it safely, wait the manual’s stated interval, and reconnect it directly to the proper grounded outlet.
A reset cannot repair a failed compressor, sensor, fan, control board or sealed-system fault. Do not repeat resets, use an extension lead, defeat a grounding pin or keep resetting a breaker. GE Appliances’ no-cooling diagnostic guidance also notes that compressors and fans can pause during a normal defrost cycle.
When to stop and call a qualified technician
Disconnect power only if it is safe to reach the plug, protect the food, and arrange service when you notice any of the following:
- a burning smell, smoke, sparking, buzzing from the outlet or an unusually hot plug;
- a damaged cord, loose outlet or breaker that trips again;
- oily residue, damaged refrigerant tubing, persistent hissing or a chemical odor;
- heavy ice behind an internal panel, a fan fault that requires cover removal, or water near electrical parts;
- both compartments remain warm after settings, airflow, doors and recovery time have been checked;
- the refrigerator repeatedly warms again after a reset.
Refrigerant, compressor, internal wiring and sealed-system repairs are not user-level work. Do not puncture tubing, bypass switches, install generic electrical parts or use a heat gun to remove ice.
How to verify the refrigerator is cooling again
- Return the controls to the manufacturer’s recommended settings.
- Keep vents clear and close the doors.
- Record the middle-shelf temperature after several hours and again after 24 hours.
- Confirm the refrigerator stays at 40°F (4°C) or below and the freezer approaches 0°F (-18°C).
- Check that door seals remain clean and that no new frost, water or electrical warning appears.
If the temperature briefly improves but rises again, service is still needed. Give the technician the model number, temperature readings, when the problem began, any display code, and which safe checks you completed.
Related SolveFast guides
If another appliance is giving trouble, use our washing machine won’t drain safety checklist. You can also return to SolveFast for current solution-focused guides.
Primary sources